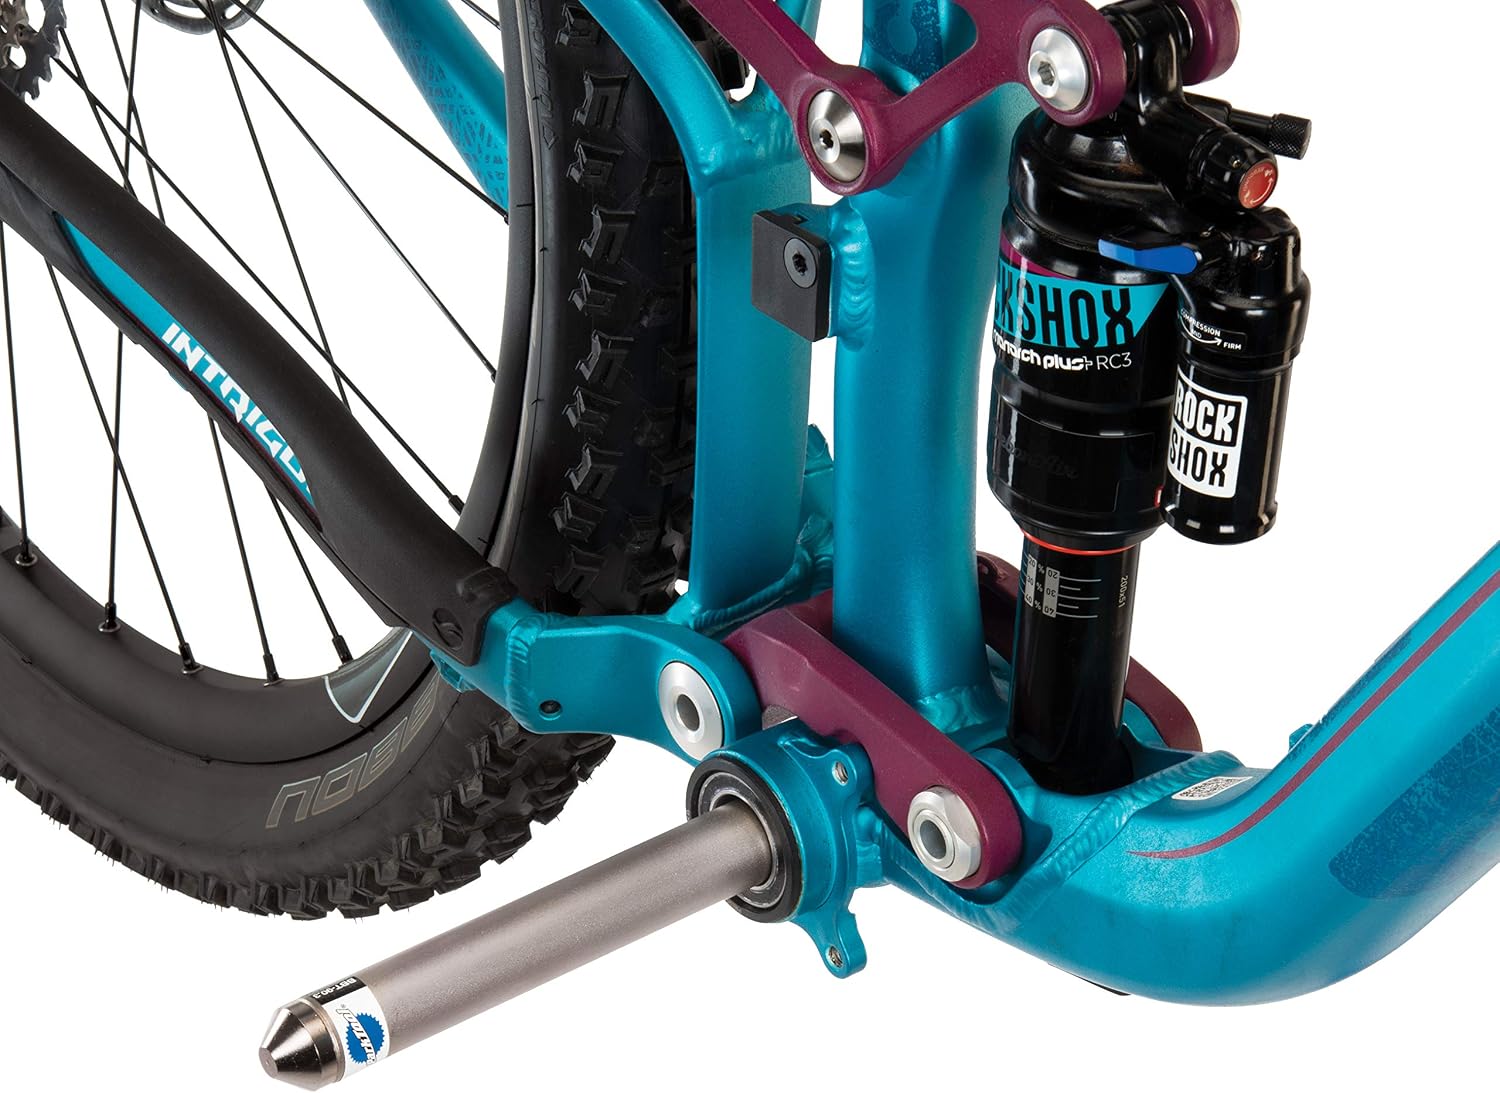
Your bottom bracket — the cylindrical bearing assembly that lives inside your bike’s frame where the pedals and cranks attach — is one of the most abused components on any bicycle. It spins under load, sits close to the ground where grit and water accumulate, and connects to the frame in ways that vary wildly depending on the year, brand, and price point of your bike. When it wears out (and it will), you need specific tools to remove it and press or thread a new one in. The catch: almost every bottom bracket tool on the market ships in a box with little to no documentation. Reviewers across dozens of products use the same language — “zero instructions,” “had to watch three or four YouTube videos,” “nice tool once I figured it out.” This article is the instruction manual those products refuse to include. Whether you’re maintaining one bike or a small fleet, here is what you actually need to know before the tool is in your hands.
| EDITOR'S PICK[Park Tool Press Fit Removal Too](https://www.amazon.com/dp/B000C12BMW?tag=greenflower20-20)… | Mid-tier[Bicycle Bottom Bracket Install](https://www.amazon.com/dp/B0B6B51L7F?tag=greenflower20-20)… | Budget pick[Mimoke Bicycle Headset Press To](https://www.amazon.com/dp/B09Y5HBYS4?tag=greenflower20-20)… | |
|---|---|---|---|
| Compatible standards | Internal BB | BB86/BB30/BB91/BB92 | BB73 BB86 BB30 BB91 BB92 PF30 |
| Removal function | ✓ | ✓ | ✗ |
| Install function | — | ✓ | ✓ |
| Price | $62.95 | $48.99 | $21.99 |
| See on Amazon → | See on Amazon → | See on Amazon → |
The Standards Problem: Why There Is No Single “Right” BB Tool
Before choosing any tool, you need to know which bottom bracket standard your frame uses. This is not optional fine print — the wrong adapter cup means a tool that physically cannot make contact with your BB, and forcing it anyway risks damaging an expensive frame shell.
The two broad families are threaded and press-fit. Threaded standards, led by the long-established BSA (British Standard, also called English threaded), use a shell with threads cut directly into it. You thread the BB cups in by hand, then torque them down. The left cup has left-hand (reverse) threads — a detail that has surprised mechanics for decades. Italian threaded frames are less common but still in circulation, with both cups using conventional right-hand threads.
Press-fit standards — PF30, BB86, BB92, BB386EVO, and others — have a smooth shell with no threads. The BB cups press directly into the shell bore under controlled force. The standard is named for the shell’s inner diameter and sometimes its width. PF30, for instance, has a 46mm inner diameter; BB86 has a 41mm inner diameter. These numbers matter because press-fit tool adapters are sized to match specific shell IDs. According to Sheldon Brown’s bottom bracket standards reference, there are at least a dozen distinct press-fit and threaded shell dimensions in active use across road and mountain bikes, which is why a single “universal” tool rarely covers all cases equally well.
T47 is a newer threaded standard gaining traction on premium builds, featuring larger shell threads (47mm inner diameter) with the stiffness benefits of wide PF30-diameter shells and the serviceability of threaded interfaces. It uses its own wrench engagement profile — neither BSA nor press-fit tools work on it without specific adapters.
VeloNews’s bottom bracket standards feature notes that even experienced mechanics frequently need to look up shell dimensions before ordering a BB or reaching for a tool, because manufacturers have not converged on a single solution. Check your frame builder’s spec sheet or measure the shell inner diameter with calipers before you proceed.
Press-Fit Install Tools: How the Mechanism Works and Where It Fails
A press-fit installation tool — sometimes called a BB press or shell press — works by drawing two adapter cups toward each other through a central threaded rod. You place one adapter cup on each side of the shell, align the BB cup bearings in the shell bore, and turn a nut (usually a 32mm or 36mm hex) to pull the rod through, pressing each bearing cup evenly into the frame.
The adapter cup size is everything. The adapter must contact the outer race of the BB cup, not the bearing itself. If the adapter is too small, it bears on the inner race and damages the bearing on installation. If it’s too large, it won’t seat in the shell. Most quality press tools ship with multiple adapter sizes — typically ranging from 37mm to 46mm — to cover the common press-fit standards. The 6-in-1 multi-notch wrench style tools reviewers praise for “covering different cup diameters in one tool” solve a related problem on the removal side: different shells and cups have different notch or spline patterns for the removal tool to engage.
Carbon frames require a different level of care. The pressing force required to install a BB is not inherently destructive, but uneven force application absolutely is. BikeRadar’s press-fit explainer stresses that on carbon frames, you must ensure your adapter cups are correctly sized so the pressing force distributes evenly around the shell bore’s full circumference. Many home mechanics and small-shop professionals successfully press BBs into carbon shells — but the margin for misalignment is smaller than on aluminum. If your adapters are worn, if the BB cups are cocked slightly in the bore, or if you are applying force unevenly, stop and recheck alignment before continuing. This is not a “always send it to a shop” situation, but it is a “go slowly and watch the gap” situation.
Why your press-fit BB won’t move even with the correct removal tool: The most common culprits are corrosion bonding (aluminum cup corroded to an aluminum shell) and Loctite or retaining compound applied by a previous mechanic. Park Tool’s BB installation documentation explicitly notes that their press-fit removal tools work effectively against grease and Teflon anti-seize paste, but will struggle against their own Loctite-style retaining compound — because the compound was engineered specifically to resist exactly this kind of force. If you encounter a bonded BB, penetrating oil soaked into the shell junction for 24–48 hours is the first step. If that fails, heat (applied carefully and not to a carbon frame) can break compound bonds. On aluminum frames, some mechanics have success with a dedicated impact-style removal approach, but this risks shell damage if the BB is truly seized.
Thread-In Tools: Torque, Left-Hand Threads, and the Grease-vs-Compound Decision
Threaded BB installation is mechanically simpler than press-fit — you are threading cups into a tapped shell — but the failure modes are still real.
Left-hand threads on the drive-side cup (BSA standard) catch everyone once. The drive-side (right, chainring side) cup tightens counterclockwise. This is intentional: pedaling torque would otherwise unscrew a conventional right-hand thread over time. Mark the drive-side cup before you start if you are new to this; it looks identical to the non-drive cup in your hand.
Torque specs matter and are not obvious from the tool. Park Tool’s published specifications for BSA threaded bottom brackets call for 35–50 Nm on steel and aluminum frames. Italian threaded BBs run similarly. This is the torque-wrench range you’re working in — well within reach of a quality 3/8-drive torque wrench set to the appropriate Nm. You do need a torque wrench here; over-tightening a threaded BB into an aluminum frame can strip threads, and under-tightening allows creaking and migration. For T47, manufacturer torque specs vary — check the specific BB manufacturer’s documentation.
Grease vs. retaining compound: For most threaded BB applications on aluminum and steel frames, anti-seize grease or copper paste on the threads is the correct prep. It allows future removal without gorilla-force and prevents galvanic corrosion where dissimilar metals meet. Retaining compound (like Loctite 648) is appropriate for press-fit applications to add security, and is sometimes specified by BB manufacturers for specific shell and cup material combinations — but it dramatically increases removal difficulty. If you are installing a BB that you expect to service in 2–3 seasons, grease is almost always the right call on threaded interfaces.
By the Numbers
| Standard | Shell ID | Tool Adapter Range Needed | Torque (Threaded) |
|---|---|---|---|
| BSA (English) | 33.6mm threaded | Splined cup tool (e.g., Park BBT-32) | 35–50 Nm |
| Italian | 35mm threaded | Italian-specific splined tool | 35–50 Nm |
| PF30 | 46mm | 46mm press adapter | Press-fit only |
| BB86/BB92 | 41mm | 41mm press adapter | Press-fit only |
| T47 | 47mm threaded | T47 spline tool | Per BB manufacturer |
Tool Overlap: When a Press-Fit Tool Works on a Threaded Shell (and Why)
Multiple reviewers of budget press-and-removal kits have noted — with some surprise — that the tools marketed for press-fit applications functioned correctly on a BSA threaded bottom bracket. This isn’t an accident or a quirk of cheap tooling. It reflects a genuine physical overlap: some threaded cup engagement profiles share geometry with certain press-fit adapter cups, particularly on removal, where you’re essentially just applying outward force to unseat the cup. The tool doesn’t care about threads; it cares about contact geometry.
This matters practically: if you work on multiple bikes with mixed standards, a high-quality press tool with a full adapter set — plus the appropriate splined wrench for your threaded cups — covers most situations. The 6-in-1 multi-notch wrench style tools praised by mechanics maintaining multiple bikes illustrate the same logic on the threaded side: one tool that spans cup engagement profiles from BB86 to PF30 to PressFit 41 reduces the drawer space and upfront cost of maintaining a diverse fleet. Former bike shop owners reviewing the Mimoke-style compact press have specifically called out its reduced bulk compared to full commercial shop presses as a meaningful advantage for mechanics not running a full-time stand-alone workshop.
Frequently Asked Questions
How do I know which adapter cup size my press-fit BB shell needs? Measure the inner diameter of your frame’s BB shell with a set of digital calipers. Common sizes are 41mm (BB86/92), 42mm (some older standards), and 46mm (PF30/BB386EVO). Cross-reference with Sheldon Brown’s bottom bracket standards page, which remains the most comprehensive publicly available reference. Your frame manufacturer’s spec sheet is the authoritative source for your specific model.
Can I use a press tool on a carbon frame, or is that always a shop job? You can use a press tool on a carbon frame, but the technique discipline is higher. The adapter cups must be correctly sized to distribute force around the full shell bore circumference. Apply force slowly, check cup alignment frequently, and stop immediately if one side is advancing faster than the other. BikeRadar’s press-fit guide recommends confirming cup alignment visually from both sides of the shell before applying full pressing force.
What is the difference between a BB removal tool and a BB installation tool — are they the same? Not exactly, though there is overlap. Installation tools press cups into the shell under controlled inward force. Removal tools apply outward force to drive cups out of the shell from the opposite side. Many kits — and some multi-function tools — include adapters that serve both functions by reversing orientation, but a dedicated installation press typically provides better force control and alignment than improvised removal setups. For threaded BBs, the same splined cup tool is used for both installation and removal.
Why won’t my press-fit BB budge even with the correct tool? Corrosion bonding and retaining compound are the two primary causes. Park Tool’s service documentation specifically flags that their removal tool is effective against grease and Teflon paste but not against their own retaining compound. Apply penetrating oil, allow 24–48 hours of soak time, and try again before escalating to heat on aluminum frames. Never apply heat to a carbon shell.
Do I need a torque wrench after pressing in a new BB, and if so, what Nm? For press-fit BBs, there is no torque spec — the cups are retained by the interference fit between cup and shell, not by a fastener. However, if your BB uses a wave washer or retaining bolt (some threaded-together PF30 designs do), follow the manufacturer’s published Nm spec. For threaded BSA BBs, 35–50 Nm is the Park Tool published range. For crank bolts and preload caps that secure the crankset to the BB spindle, torque specs vary by crank manufacturer — always verify against the crank documentation, not the BB documentation.
The decision rule: If you work on one bike with a known standard, buy the specific tool for that standard and a quality torque wrench. If you maintain three or more bikes across mixed standards — or run a small coaching or mechanic operation — invest in a press tool with a full adapter set and a multi-notch cup wrench that spans the engagement profiles you actually encounter. The hidden cost of under-tooling is a damaged frame shell or a bearing destroyed on installation, not the price difference between a budget and mid-tier tool.