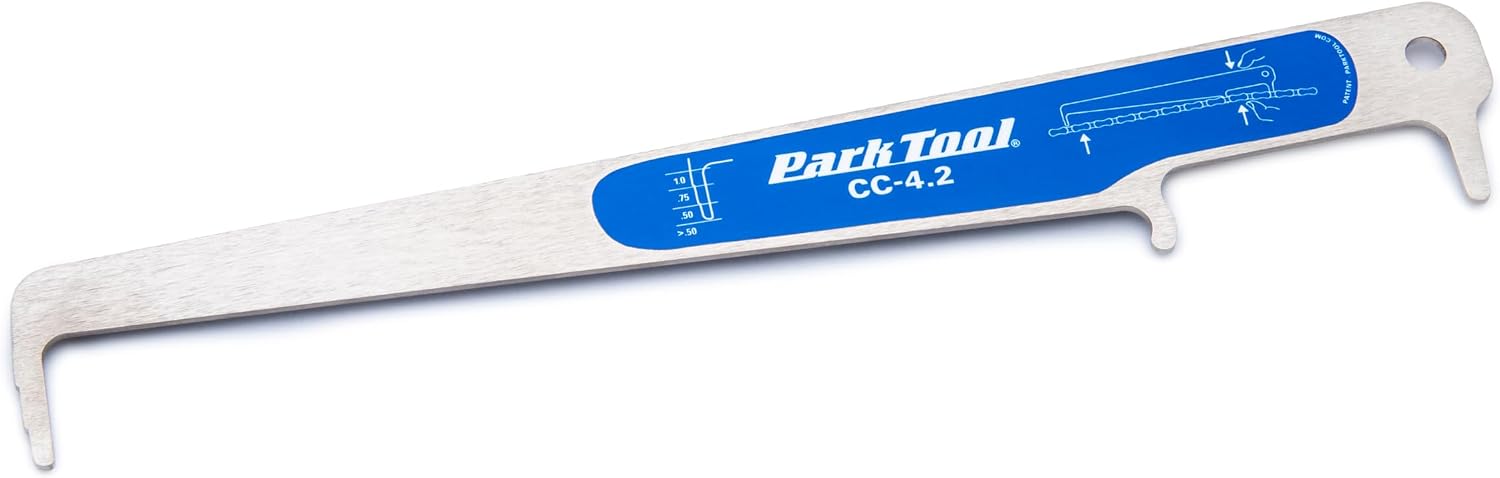
Your drivetrain is the mechanical heart of your bike — the chain, cassette (the cluster of gears at your rear wheel), and chainrings (the large toothed rings at the pedals) all work together as a system. The problem is that chains don’t fail dramatically; they wear out slowly, elongating link by link in a process cyclists call “chain stretch.” That stretch is technically a misnomer — the metal itself isn’t stretching, the internal rollers and pins are wearing down, which causes the chain to measure longer than it should. Left unchecked, a worn chain acts like sandpaper on the precision teeth of your cassette and chainrings, accelerating their wear and eventually forcing a much more expensive multi-component replacement. A chain wear checker — a small gauge tool, usually under $30 — is how you catch that wear before it jumps to the expensive parts. This article breaks down which tools are worth owning, what the measurement numbers actually mean, and how to run the cost-of-ownership math that makes the case for checking your chain every 300–500 miles.
What Chain Wear Actually Costs You (The Math Nobody Does)
Before picking a tool, it helps to internalize the economics. Shimano’s SI technical document library specifies that chains should be replaced at 0.5% elongation for high-end 11- and 12-speed drivetrains, and no later than 0.75% for 8–10-speed systems. Those percentages correspond to the readings on a chain wear checker: a reading of 0.5 means 0.5% elongation, a reading of 0.75 means 0.75%.
Here’s why that precision matters financially.
By the numbers:
| Replace chain at… | Chain cost | Cassette life (chains per cassette) | Cassette cost | Cost per 10,000 miles |
|---|---|---|---|---|
| 0.5% (recommended) | $30–$60 × ~3–4 chains | 3–4 chains | $60–$300 × 1 cassette | ~$150–$540 |
| 0.75–1.0% (late) | $30–$60 × ~2–3 chains | 1–2 chains | $60–$300 × 2–3 cassettes | ~$240–$1,200 |
The spread is significant, and at the top tier — SRAM Red AXS or Shimano Dura-Ace Di2 cassettes running $250–$400+ — waiting too long to replace a $45 chain can cascade into a $700 drivetrain rebuild. CyclingNews’s workshop feature on drivetrain wear puts it plainly: a cassette worn in sync with a stretched chain will reject a new chain almost immediately, forcing you to replace both components together rather than staggering the expense.
BikeRadar’s chain checker buyer’s guide reinforces this with a useful framing: the chain is the consumable that protects the non-consumables. Treat it like a sacrificial component with a defined service interval and you’re doing drivetrain maintenance correctly.
The Three Tool Tiers: What You Actually Need vs. What You’re Paying For
Chain wear checkers fall into three practical tiers. Here’s how to think about each.
Tier 1: Go/No-Go Gauges ($5–$15)
These are simple two-pin or single-pin drop-in tools — you slot them between chain rollers and the device either fits (worn) or doesn’t (still good). Park Tool’s CC-3.2 is the most-referenced example in this category. Sheldon Brown’s documentation on chain wear notes that the go/no-go concept is reliable enough for regular riders who want a quick pass/fail check every few rides.
The tradeoff: These tools typically check at a single threshold, often 0.75% or 1.0%. For 8–10-speed drivetrains, that’s fine — Shimano’s chain replacement guidance for those speeds aligns with the 0.75% mark. But if you’re running an 11- or 12-speed system (SRAM Eagle, Shimano Dura-Ace, Campagnolo Super Record EPS), single-threshold gauges will let you ride past the optimal replacement point for those drivetrains. You’ll be protecting your cassette less effectively than you think.
If X, then Y: If you run an 8–10-speed drivetrain on a bike with a mid-range cassette (under $100), a go/no-go gauge is a completely rational buy. The savings aren’t large enough to justify more precision.
Tier 2: Dual-Reading Gauges ($15–$30)
Tools like the Park Tool CC-4, Shimano’s TL-CN42, and the Pedro’s Chain Checker Plus offer two measurement positions — typically 0.5% and 0.75%. This is the tier that matters most for the largest segment of performance riders. You get an early warning at 0.5% and a final call at 0.75%, which maps directly onto Shimano’s own published replacement thresholds for 11- and 12-speed chains (per the SI document library).
Owners across aggregated reviews consistently identify the Park Tool CC-4 as the benchmark in this tier — it’s durable, dimensionally consistent, and the dual-slot design removes ambiguity from the reading. The Pedro’s Chain Checker Plus gets mentioned favorably for its compact format and slightly more ergonomic grip, though reviewers note the go/no-go feel is marginally less crisp.
The real value of dual readings isn’t catching wear at exactly 0.5% on day one. It’s the interval discipline. When your checker drops into the 0.5% slot, you know you’re in the planning window: order your next chain now, ride two or three more sessions, replace before you cross into 0.75%. That’s the behavior that actually saves cassettes.
If X, then Y: If you’re running any 11- or 12-speed drivetrain, a dual-reading gauge is non-negotiable. The $15–$30 price point is trivial against the replacement cost at stake. This is our recommended entry point for anyone in this guide’s primary audience.
Tier 3: Precision Calipers and Digital Gauges ($30–$80+)
At the top end, you have tools like the Shimano TL-CN42 in its precision variant, the Wippermann Connex Link Checker, and general-purpose digital calipers used with a 12-link measurement standard. Sheldon Brown’s chain wear methodology details the 12-link standard: a new chain measures 12 inches across 12 links; at 0.5% wear it measures 12-1/16 inches; at 1.0% it measures 12-⅛ inches. Digital calipers to ±0.01mm resolution make this measurement definitive.
VeloNews’s drivetrain maintenance feature notes that professional mechanics often use digital calipers precisely because they give a continuous reading rather than a binary slot-fit — you can track the wear curve across multiple check-ins and predict replacement timing rather than react to it.
This matters for shop mechanics maintaining a fleet of bikes, coaches tracking athletes’ equipment, or custom builders who want service records. For a single high-end personal build, dual-reading gauges are usually sufficient. For anyone maintaining four or more drivetrains, the caliper method pays for itself in prevention and records.
If X, then Y: If you’re a small-shop mechanic, cycling coach, or maintain more than three bikes regularly, invest in a quality digital caliper set and use the 12-link standard. The precision isn’t overkill — it’s what lets you turn reactive maintenance into scheduled maintenance.
Compatibility Details That Change Your Replacement Window
This is where the practitioner-level nuance lives. Not all 12-speed chains are on the same replacement schedule, and the checker reading alone doesn’t tell the full story.
SRAM Eagle chains (12-speed): SRAM’s technical documentation recommends replacement at 0.5% for AXS-compatible drivetrains. Eagle cassettes, especially XG-1299 units in the $250–$350 range, develop wear hooks faster than steel options once chain elongation begins. The 0.5% threshold isn’t conservative here — it’s the economically correct call given cassette cost.
Shimano Dura-Ace and Ultegra 12-speed: Shimano’s SI documentation specifies 0.5% as the replacement point for 12-speed CN-M9100 and equivalent chains. The HG+ chain design in Dura-Ace 9200 is precision-matched to the cassette tooth profile; running it past 0.5% degrades shifting quality measurably before the chain audibly skips.
Campagnolo Super Record EPS: Campagnolo’s own technical guidance aligns with the 0.5% mark. Super Record cassettes in the $400–$600 range represent a category where every additional 200 miles of worn-chain riding is a quantifiable financial decision.
Steel vs. aluminum cassette bodies: Aluminum-body cassettes (common on lightweight climbing-spec builds) show wear faster than full-steel options. BikeRadar’s drivetrain longevity overview notes that riders on alloy cassettes should err toward replacing chains at the early end of the 0.5% window rather than riding to the edge of it.
The takeaway: your checker’s reading only means something if you know what threshold applies to your specific drivetrain. Bookmark the appropriate Shimano SI document or SRAM technical spec for your groupset and treat those numbers as your actual replacement trigger — not a generic “replace at 0.75%” rule you heard somewhere.
Building the Habit: When and How to Check
The tool only saves money if you use it. The friction point for most riders isn’t cost — it’s building a consistent check interval.
A workable system based on patterns across long-run owner reviews: hang your chain checker on the same hook as your floor pump. Every time you pump tires before a ride, do a 10-second chain check. It takes no additional setup time, and it means you’re checking roughly every 200–400 miles depending on ride frequency — well within the interval where you’ll catch 0.5% wear before it reaches 0.75%.
For gravel and mountain bike riders dealing with mud, grit, and wet conditions, BikeRadar recommends tightening that interval to every 200–250 miles, since abrasive contamination accelerates internal roller wear regardless of lubrication quality.
The final variable is chain lubrication. Silca’s Secret Chain Blend and similar wax-based lubricants have attracted significant attention in the drivetrain efficiency community, with multiple published independent assessments noting reduced wear rates compared to wet lubricants in controlled-condition testing. If you’re running a premium wax treatment, your chain may reach 300–400 miles at 0.5% wear instead of 200 miles — but you still need to check. The lube reduces wear rate; it doesn’t make checking optional.
The Decision Rule
If you walk away with one framework: match your tool tier to your cassette’s replacement cost.
- Cassette under $80 and 8–10-speed drivetrain → go/no-go gauge, check every 400–500 miles.
- Cassette $80–$200 and 11-speed drivetrain → dual-reading gauge, check every 300 miles, replace at 0.5%.
- Cassette $200+ and 12-speed (SRAM Eagle, Dura-Ace, Super Record) → dual-reading gauge minimum, digital caliper preferred, check every 200–250 miles, replace at or before 0.5% without exception.
The checker itself is never the limiting factor. A $20 Park Tool CC-4 is sufficient to protect a $400 cassette — as long as you actually use it, know your threshold, and act on the reading before the damage is done.